
3.3 KiB
3.3 KiB
| sidebar_position | title |
|---|---|
| 3 | Restoring a Database |
Restoring a Database
WARNING: Restoring a database replaces its current contents. Always confirm you are targeting the correct server and database before proceeding. Close any active connections to the target database beforehand.
Restore from a Full Backup
- In Object Explorer, right-click the Databases node (not a specific database) and select Restore Database…

- The Restore Database window opens on the General page. Under Source, select Device, then click the … (Browse) button.
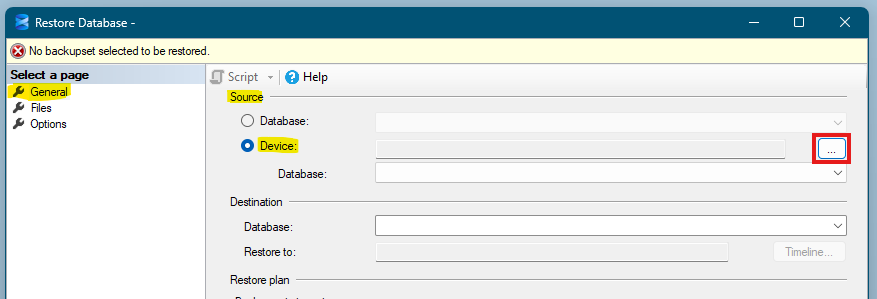
- In the Select backup devices dialog, click Add.

- Navigate to your
.bakfile, select it, and click OK. Then click OK again to close the dialog.

- The backup details will populate in the Backup sets to restore grid. Verify that the correct backup is checked.
- Under Destination, confirm the database name in the Database field. You can type a new name here to restore as a different database.

- Go to the Options page (left-hand panel). Check Close existing connections to the destination database to avoid connection conflicts during restore.
- Click OK to begin.

- A confirmation message will appear on success.

Restore from a Full + Differential Backup
- Follow steps 1–4 above, but when adding backup devices, add both the full backup file and the differential backup file.

- SSMS will automatically detect the backup types and display them in the correct order in the Backup sets to restore grid.
- Make sure both the full and differential entries are checked.

- Go to Options, check Close existing connections to the destination database.
- Click OK to restore.
Point-in-Time Recovery (Transaction Logs)
- Follow steps 1–4 above, adding the full backup file and all transaction log (
.trn) files in the Select backup devices dialog.
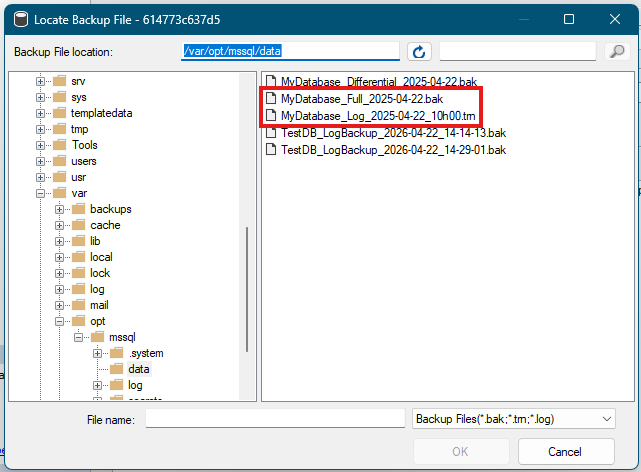
- SSMS will list all backup sets in the correct sequence in the grid. Verify all needed entries are checked.
- To restore to a specific point in time, click the Timeline… button at the top of the General page. In the Backup Timeline dialog, drag the slider or type a specific date and time, then click OK.

- Go to Options, check Close existing connections to the destination database.
- Click OK to run the restore.
Restoring to a Different Server or Name
To restore a backup onto a different server, or under a different database name:
- Connect SSMS to the target server (not the original one).
- Follow the restore steps in the section above.
- At step 6, change the Database name field to your desired new name.
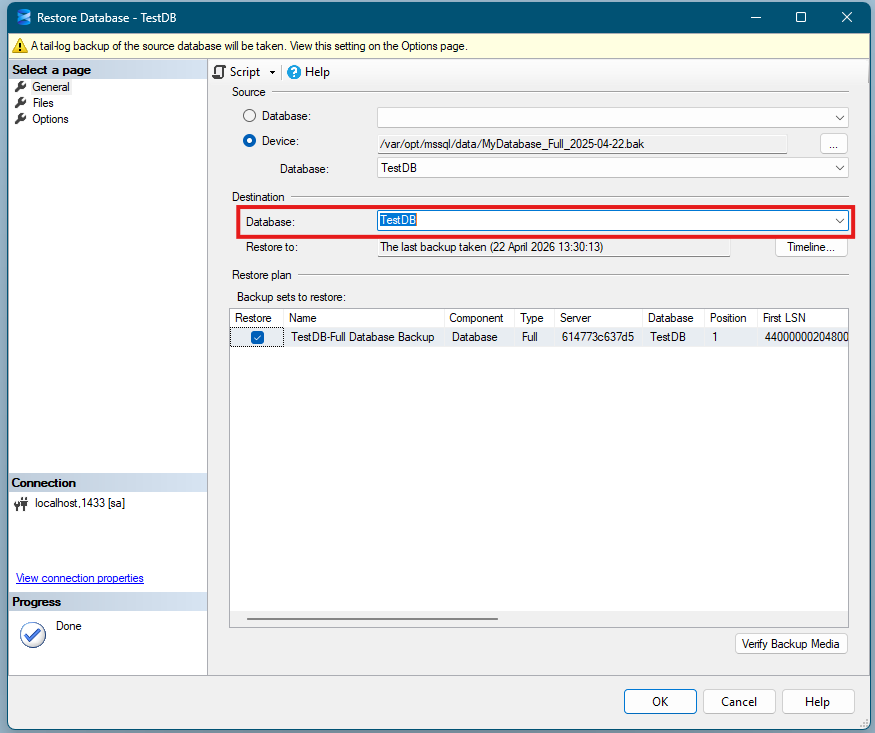
- Go to the Files page (left-hand panel). You will see the original file paths listed. Check Relocate all files to folder and specify the data and log folders on the target server.

- Click OK to restore.